Prusa Slicer Download (2.9.2) | Free 3D Printing Software
Prusa Slicer is a free and open-source 3D printing slicer software designed by Prusa Research. The G-Code’s instructions produce high-quality prints. It is suitable for professional 3D printers. Its advanced features, high printing capabilities, and open-source nature increase its popularity. This is a complete printing solution for everyone, whether a beginner or an expert. According to the Prusa Community, over 400,000 printers have been sold, and the sales rate continues to increase day by day.
What is Prusa Slicer Online?
This software works with 3D models and uses G-Code instructions to produce high-quality prints. It supports Modern printers, like Marlin, Prusa, etc. For wider choices, it supports third-party printers with the Prusa printer. Prusa Research offers updates to provide the latest 3D printing technologies.
Simple, Advanced, and Expert modes make it suitable for everyone, from beginners to experts. The Slicer supports various file formats, such as 3MF, OBJ, AMF, and STL, and provides tools such as move, rotate, and scale to help you achieve the best print quality. Controllers like LinuxCNC, MachineKit, and Mach3 are compatible with Prusa.
How to download the Prusa Slicer 2.9.2 Latest Version?
On Windows
|
Latest Version |
2.9.2 |
|
Requirement |
Windows 10 -X64 |
|
File Size |
96MB |
|
Last Update |
On MacOS
|
Latest version |
2.9.2 |
|
Required version |
Universal |
|
File Size |
130MB |
|
Last Update |
For Prusa Slicer Linux (Older-Distros)
|
Version |
2.8.1 |
|
Requirement |
Ubuntu 22.04, Debian 11, Fedora 39 |
|
File Size |
90.2 MB |
|
Updated on |
Prusa Slicer Linux (Newer-Distros)
|
Latest version |
2.8.1 |
|
Requirement |
Ubuntu 22.04, Debian 11, Fedora 40 |
|
File Size |
94.2 MB |
|
Updated on |
What are the installation instructions for PrusaSlicer?
For Prusa Slicer Windows
Step 1: Install Prusa Slicer Installer
- Visit the abc.com download page. Choose the window’s version.
- Click the installer file named “prusaslicer-<version>.exe” to begin the download.
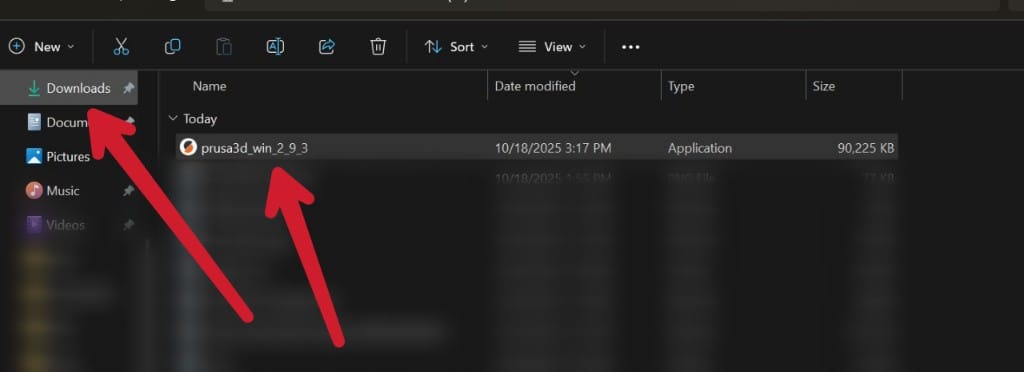
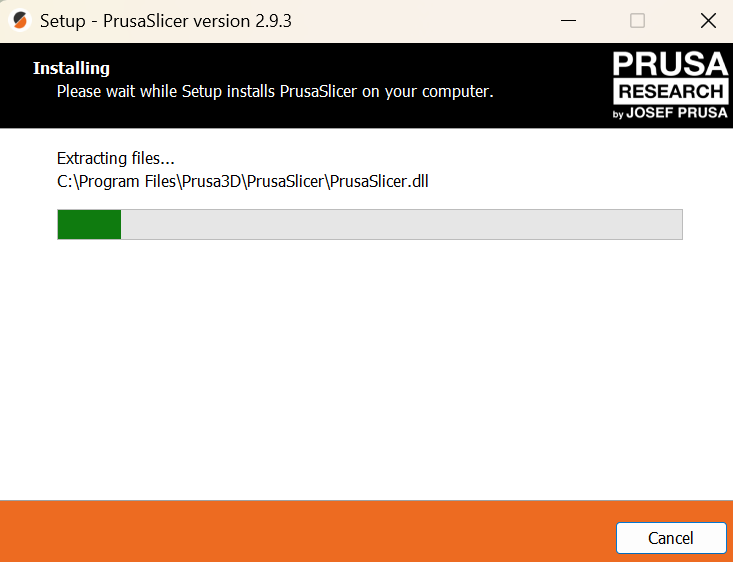
Step 2: Run the Installer
- Go to the download folder and locate it.
- Double-click on it to launch it.
- Grant the necessary permission to run it.
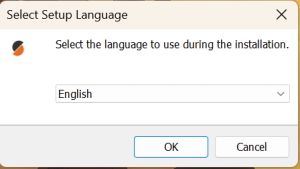
Step 3: Follow the installation Wizard
- Tap on the “Next” option to accept the license agreement.
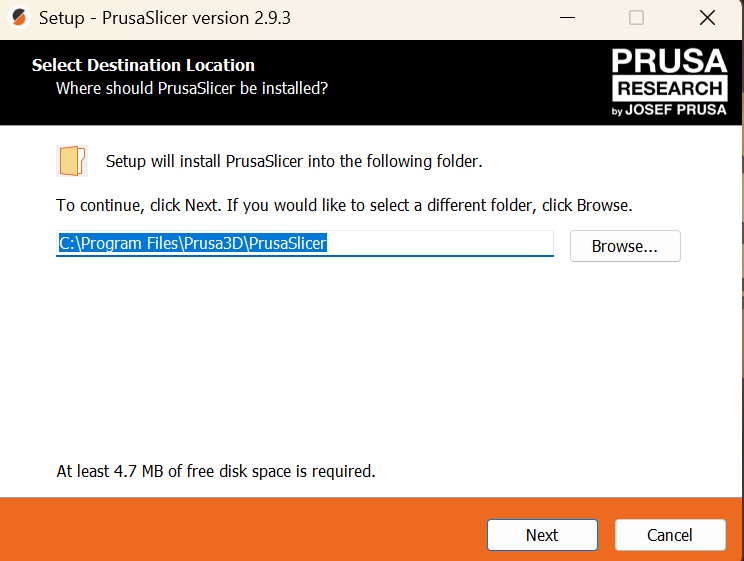
- Choose the installation folder and keep the default directory, which is typically (C:/Program Files/PrusaSlicer).
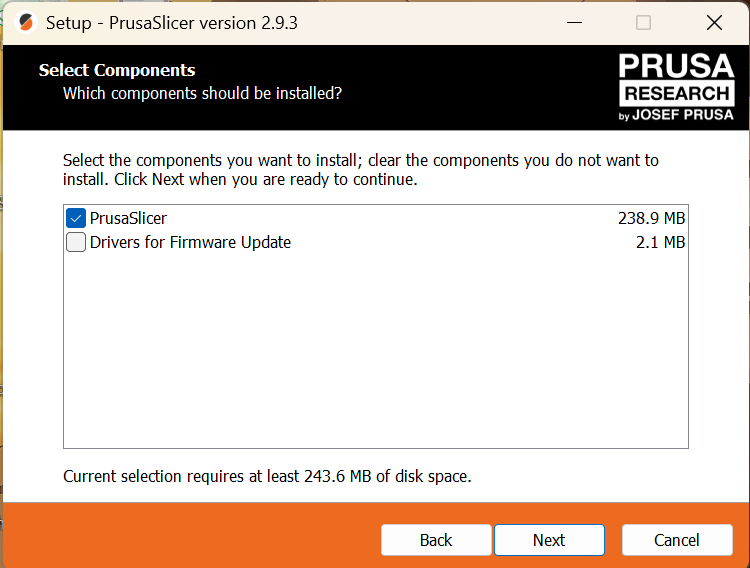
- Select additional components like desktop shortcuts or language packs, then click the install button.
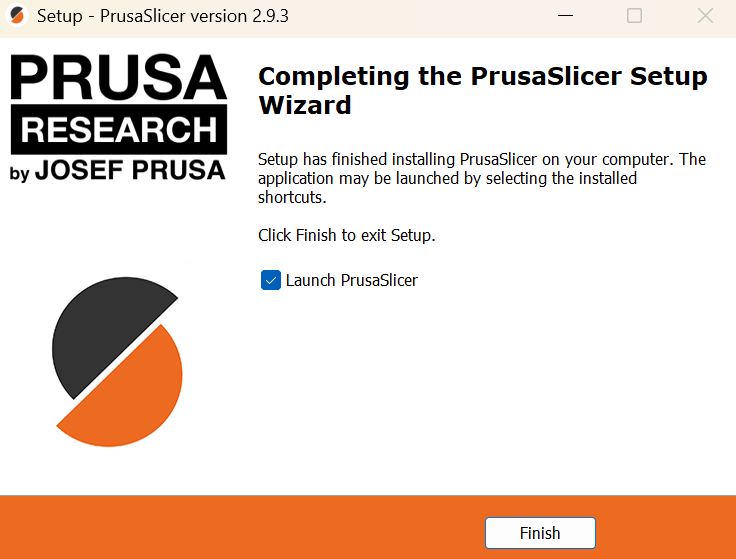
Step 4: Finish the installation
- Once you have completed the installation process, click on “Finish.”
- Now, choose to launch “Prusa Slicer” quickly by selecting the option on the last page of the wizard.
Steps 5: Steps to Setup
- After launching for the first time, set the printer’s settings.
- Choose the 3D printer model, filaments, and other important details.

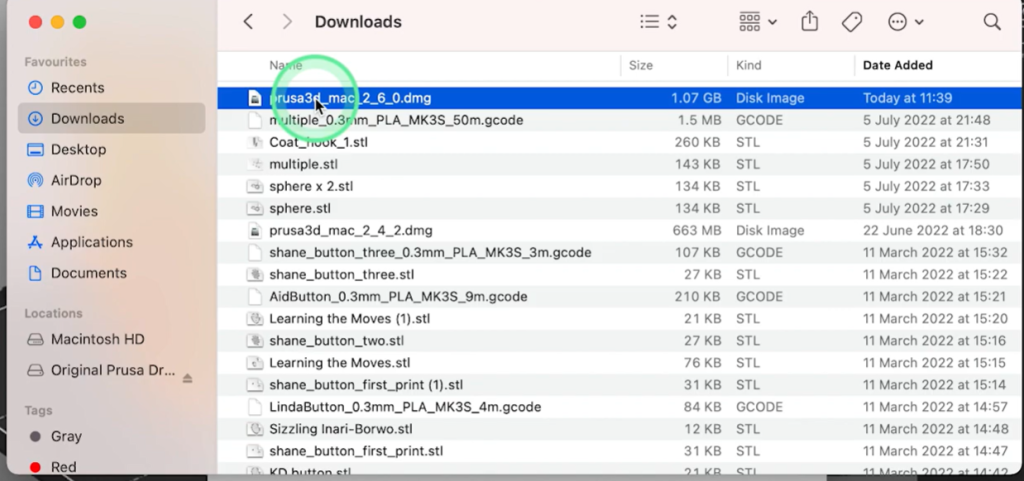
For Download Prusa Slicer MacOS
Step 1: Download DMG File
- Download the macOS version of PrusaSlicer, such as PrusaSlicer-<version>.dmg, from the PrusaSlicer page.

Step 2: Open the installation Window
- Go to the download folder and find the DMG file.
- Double-click it to open it because it will open the installation window.
Step 3: Drag Prusa Slicer Apps
- It will appear at the window, drag the prusasilcer icon to the Application folder.
- After completing it, eject the DMG by dragging it to the trash.

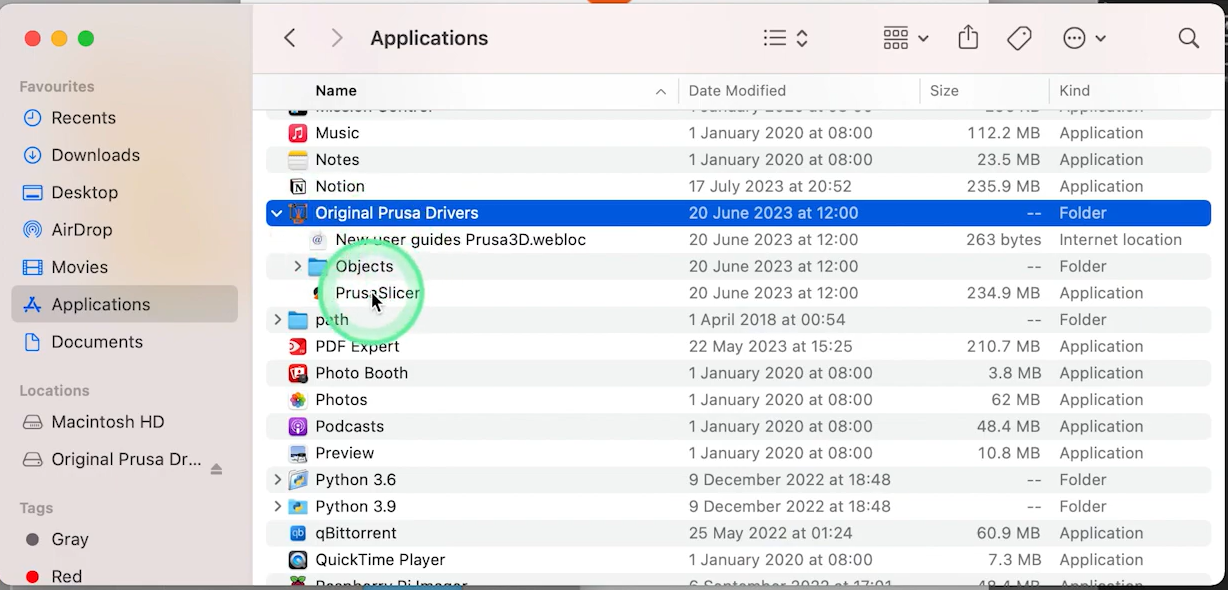
Step 4: Open PrusaSilcer
- Locate the Applications, find PrusaSilcer, and double-click to open it.
- You will see the security prompts if you are using it for the first time. Resolve it, open the System Preferences> Security and Privacy. Now, click the “Open Anyway.”
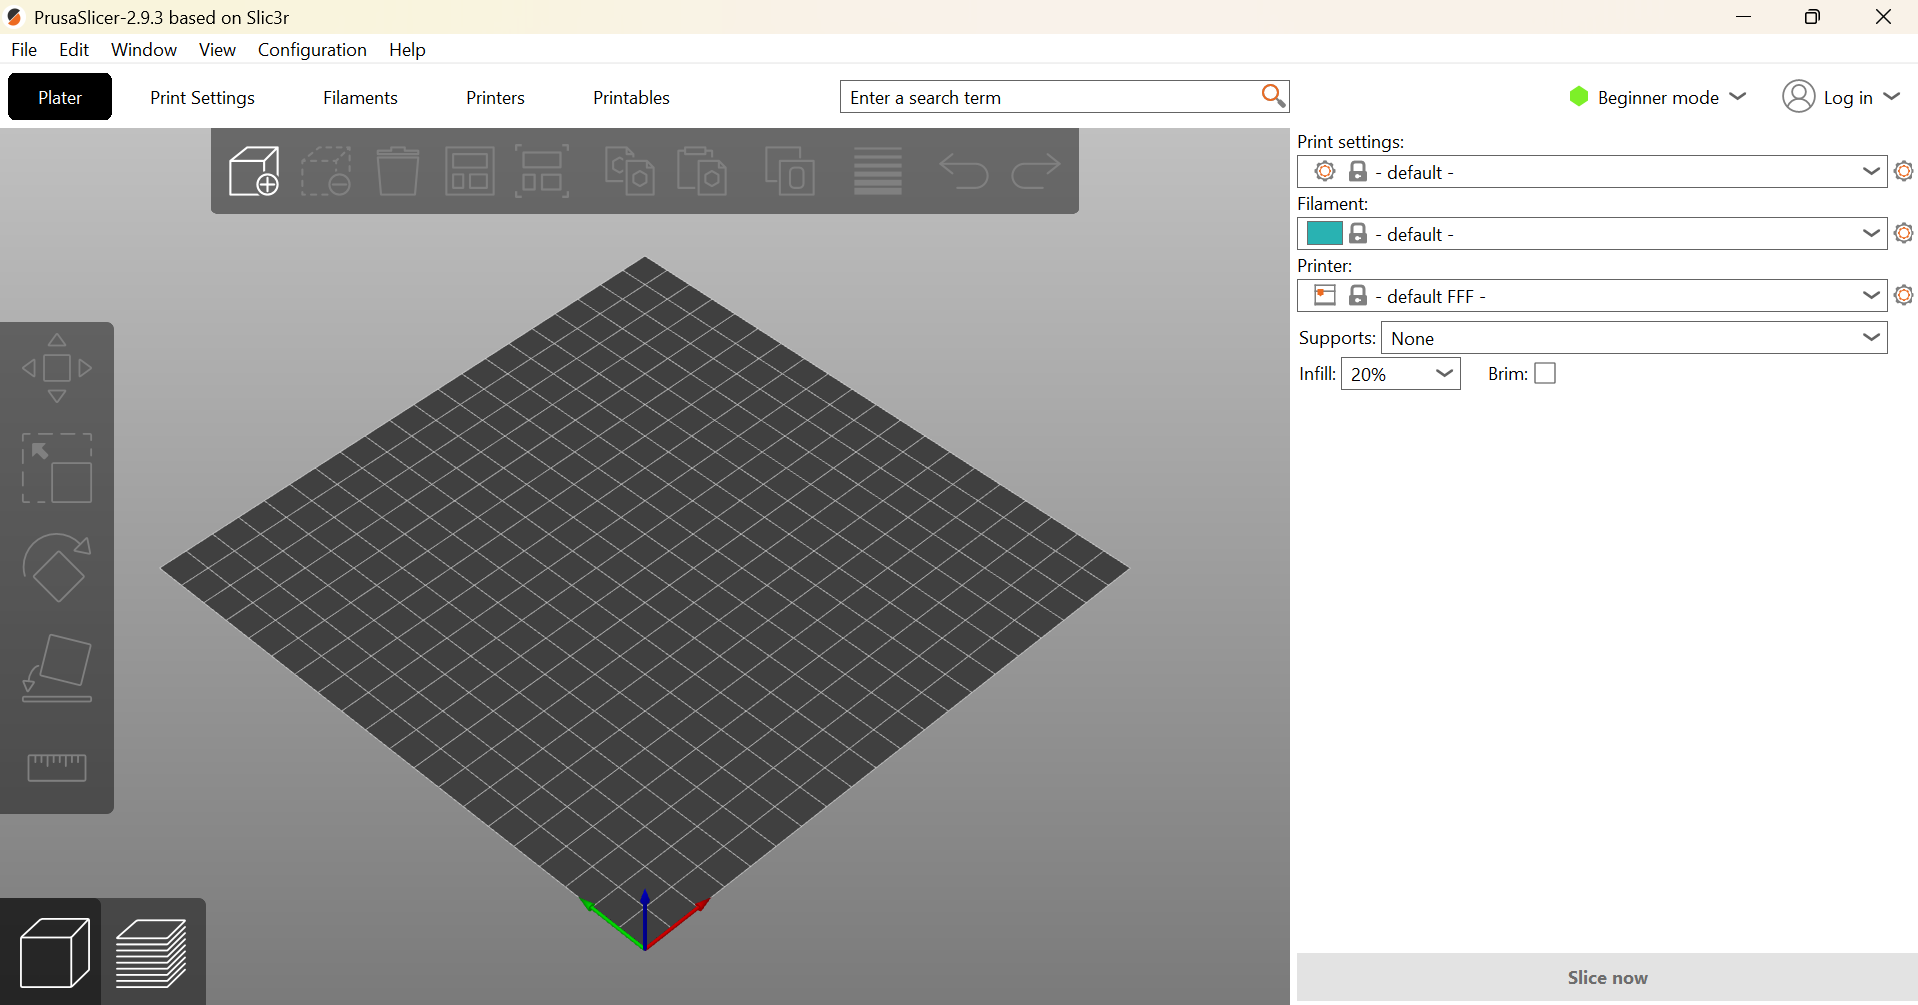
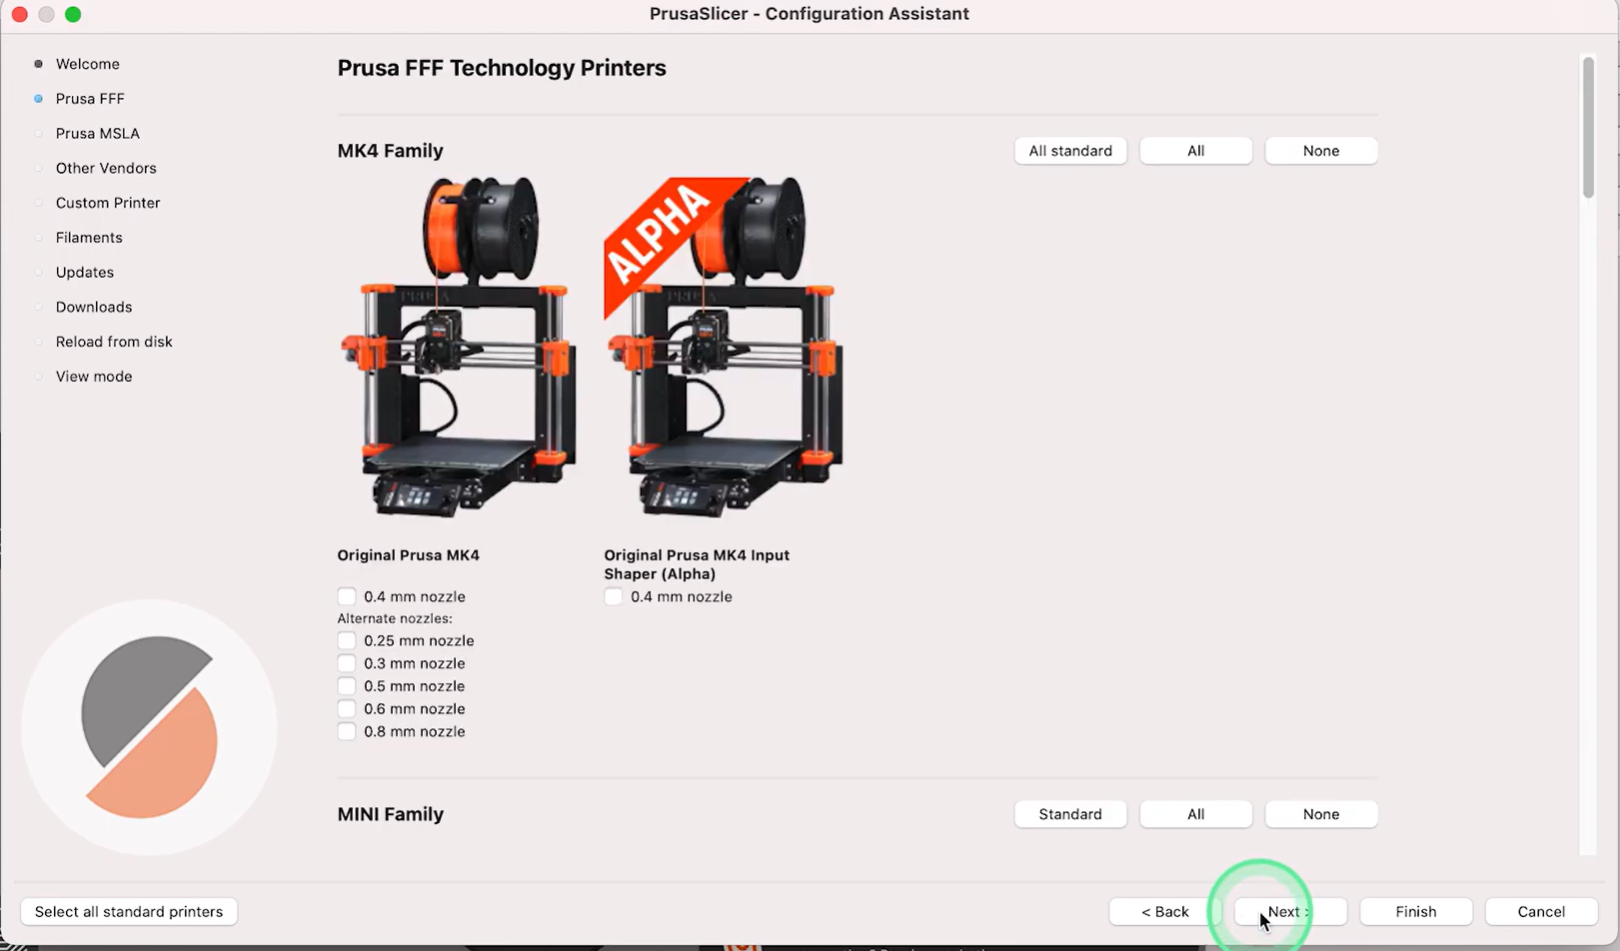
Step 5: Set up the Printer
- Follow the initial configuration process to choose your 3D printer and favorite printer settings.
For Linux
Step 1: Download Linux Package
Download the AppImage from the PrusaSlicer page for Linux, e.g, (prusaslicer-<version>.appimage).
Step 2: Make the AppImage Executable
Go to the download section and navigate to the AppImage file. cd~/Downloads
To make the file executable, run the command given below: Chmod+x prusaslicer-<version>.AppImage
Steps 3: Run the AppImage
To start the software, execute the file:
./prusaslicer-<version>.AppImage
After that, your software will launch and proceed to configure your printer and filament settings.
Optional: Create a Shortcut for Desktop
To launch this software in the future easily, create a desktop shortcut. For this write .desktop file, or use your Linux environment’s GUI to run the AppImage on your taskbar.
How to use Prusa Slicer?
1. Printer Setup
- Select the printer model from the built-in profiles and set it manually.
- Pick a filament profile from the preset. You can also create on your own.
- Choose the print mode. If you’re a beginner, select Simple mode; if you’re an expert, use Advanced or Expert mode.

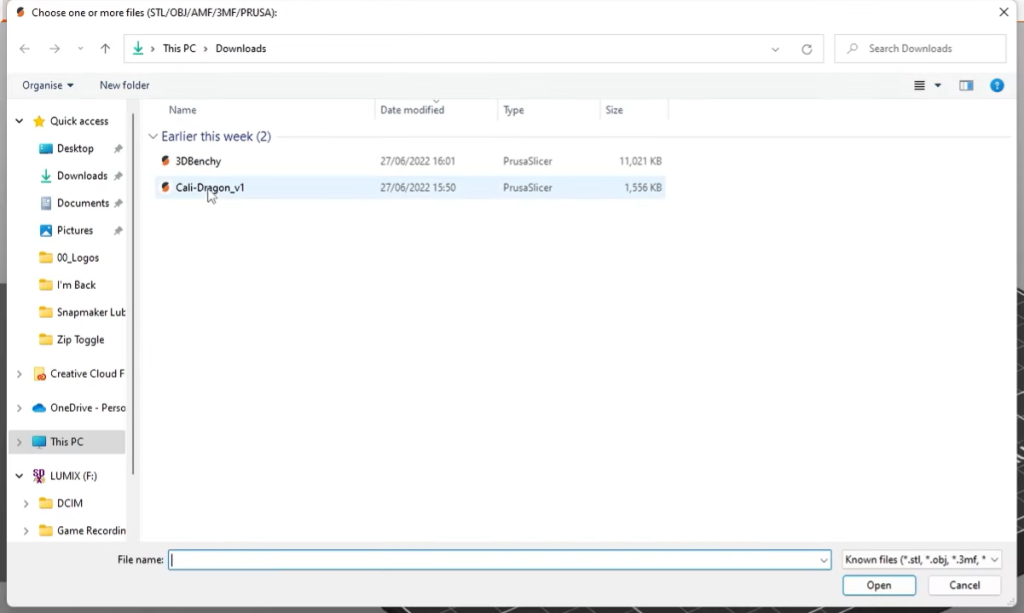
2. Import 3D Models
- Drop your model file into the slicer.
- Use tools such as move, rotate, or scale on the model. You can also use the “Auto Arrange” option to achieve optimized results.
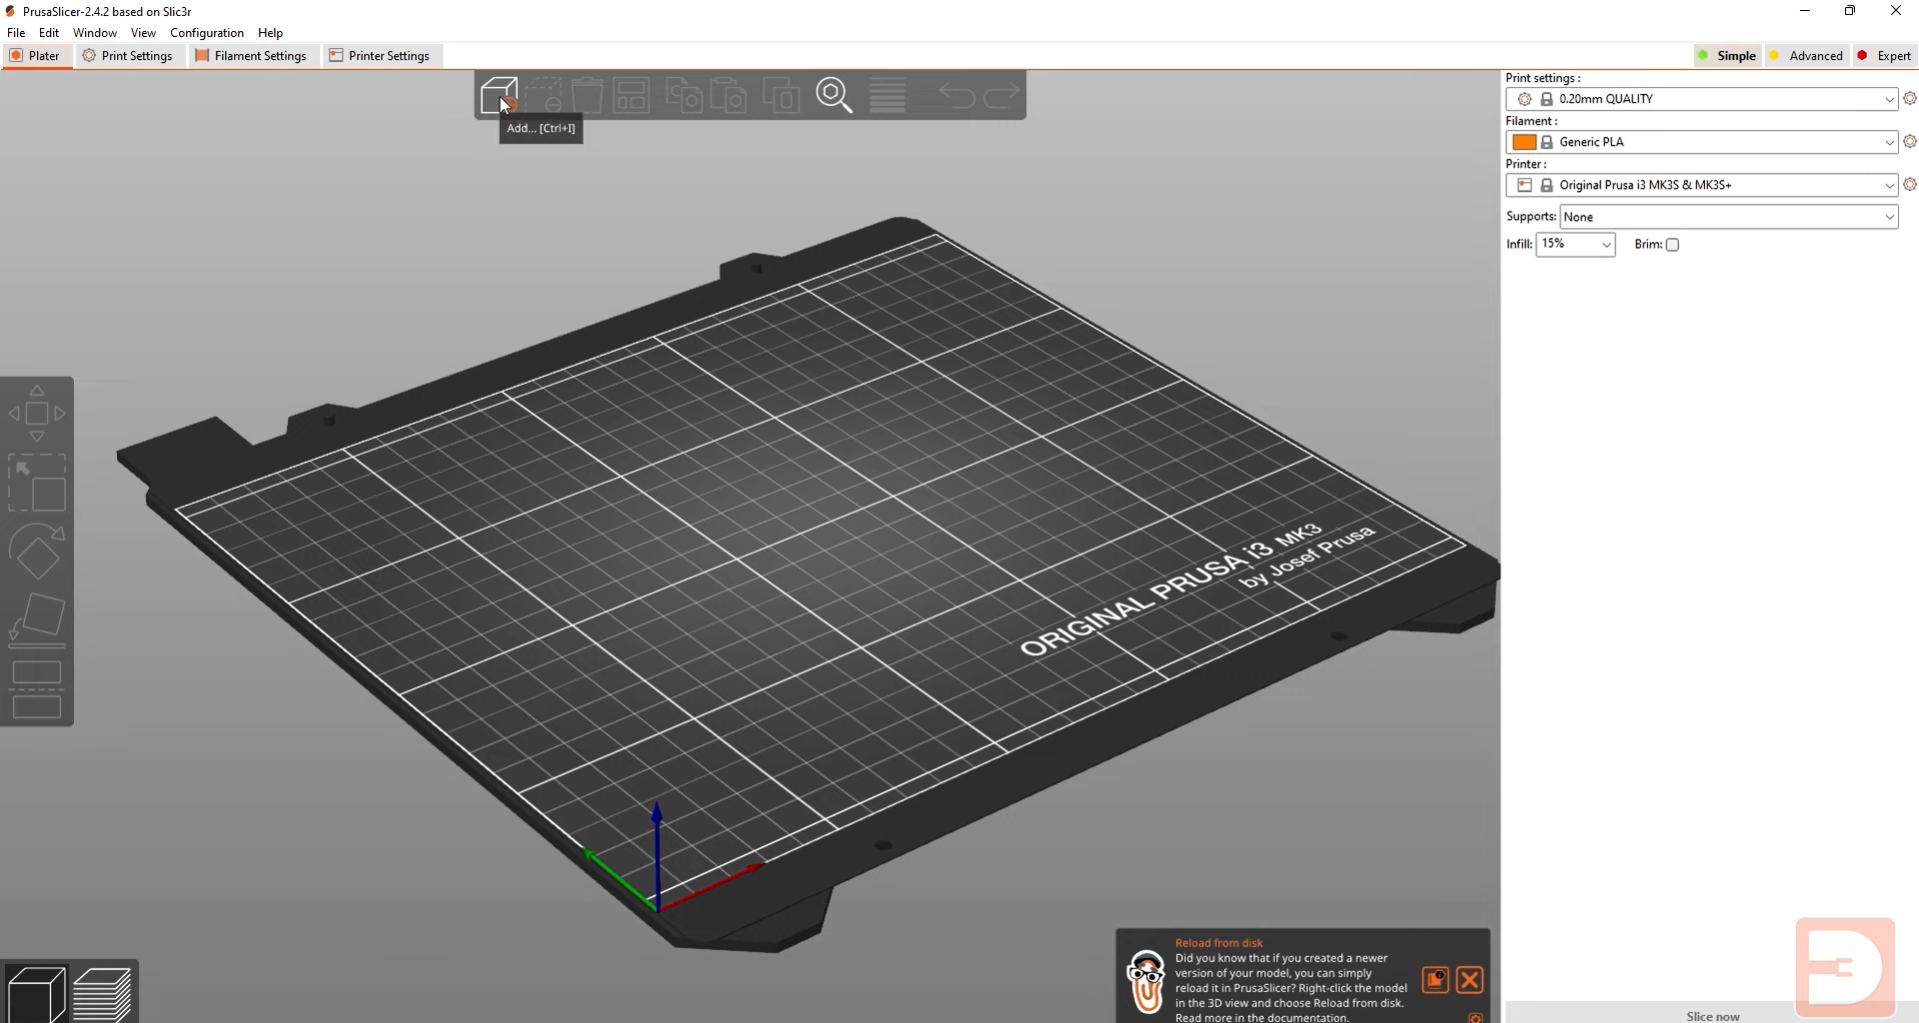
3. Adjust Print Settings
- Adjust layer height; a lower height results in finer detail, while a higher height results in faster prints.
- Infill the density and pattern from the given options.
- For complex shapes, use supports. Usually, 2 – 3 perimeters are enough.
4. Slice the Model
- Click on the “Slice Now” to generate G-Code.
- Preview the toolpath to check everything is correct.
- Now, save the G-Code to your PC.
5. Start Printing
- Load filament and use a clean printer bed.
- Transfer the G-Code using USB or an SD card.
- Start printing.
- Preview the first layer to ensure proper adhesion.
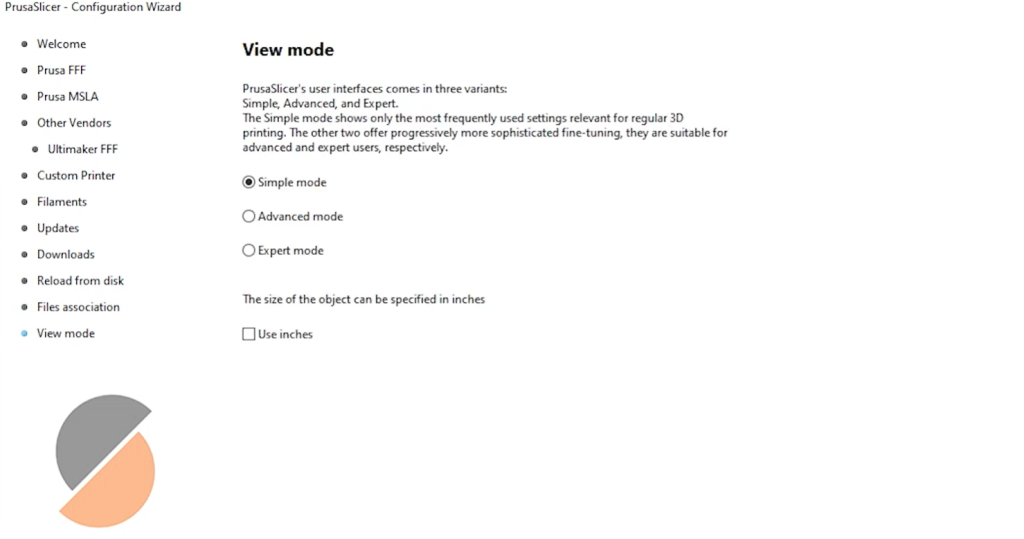
How many modes are offered by the Prusa Software?
Simple Mode
This mode is perfect for those who are just starting out. It contains fewer configuration options with a simple interface.
Advanced Mode
The advanced mode contains advanced functions for fine-tuning the print parameters. It supports Prusa Slicer infill patterns, print speed, and material generation.
Expert Mode
It gives maximum control to the user with a full array of settings.
Why choose Prusa Slicer Software? Top Features That Make it Worth Downloading
This software is especially designed for 3D Printer users. It’s a free, open-source, and friendly interface software. Allows advanced customizations and much more. Here are some justifications for selecting this fantastic web application:
Support Wide File Format
It supports wide and popular 3D file formats, like 3MF, AMF, STL, and OBJ. Not only this, but it also works seamlessly with the multiple designs from different CAD programs.
Custom Support Structure
Custom support helps to achieve greater stability for complex designs and minimizes material waste. With this, users can get enhanced control.
Input Shaping for Reduced Print Vibrations
It minimizes vibrations and ringing, delivering smoother, faster, and high-quality prints.
Support Various Devices
This efficient software works seamlessly on Windows, macOS, and Linux, supporting both Prusa and third-party 3D printers for versatile performance.
G-Code Preview
G-Code preview facilitates you to preview the print layer by layer to check if it is working correctly. It helps in a verified print setup with minimal errors.
Multi-Material Printing Support
This open-source software supports multi-material printing, allowing smooth color transitions and easy customization in a single print.
Works on Multi-bed Projects
PrusaSlicer lets users manage multi-part projects with up to 9 virtual print beds, slice individually or together, and view total filament use and print time.
SLA and FDM Support
Originally optimized for FDM printing, PrusaSlicer now supports SLA printers, offering faster, easier, and more efficient resin printing.
Text Embossing and Cutting Tools
PrusaSlicer now lets users emboss custom text and use an improved cutting tool for easier, more precise 3D model slicing.
Prusa Slicer Temp Tower
This advanced feature controls the temperature that adjusts different filament types. It minimizes the wrapping during printing and reduces the nozzle and bed temperature.
PrusaSlicer Community and Open-Source Support
This open-source software, powered by Prusa Research and community contributions, lets users customize, enhance, and share printer settings easily.
Integrated Prusa Printer and PrusaConnect
This open-source software, powered by Prusa Research and community contributions, lets users customize, enhance, and share printer settings easily.
Printer Profile and Custom Filament
The 3D Prusa Printer gives full control over filament settings to set every detail easily:
Color: Choose a final color to finalize the 3D model
Diameter: Add filament size (e.g, 1.75mm) for perfect extrusion.
Density: Add filament weight and material properties.
Spool Weight: Add pure spool weight to calculate the slicer.
Other Features
- Spiral vase mode for bumpless vases
- MSLA and MMU Support
- Regular Updates
- The Arache perimeter generator
- Support HiDPI for correct scaling on high-resolution displays
- Support multiple languages
- Group selection
- Built-in Shape Gallery
- tree support
- Prusa Slicer organic supports
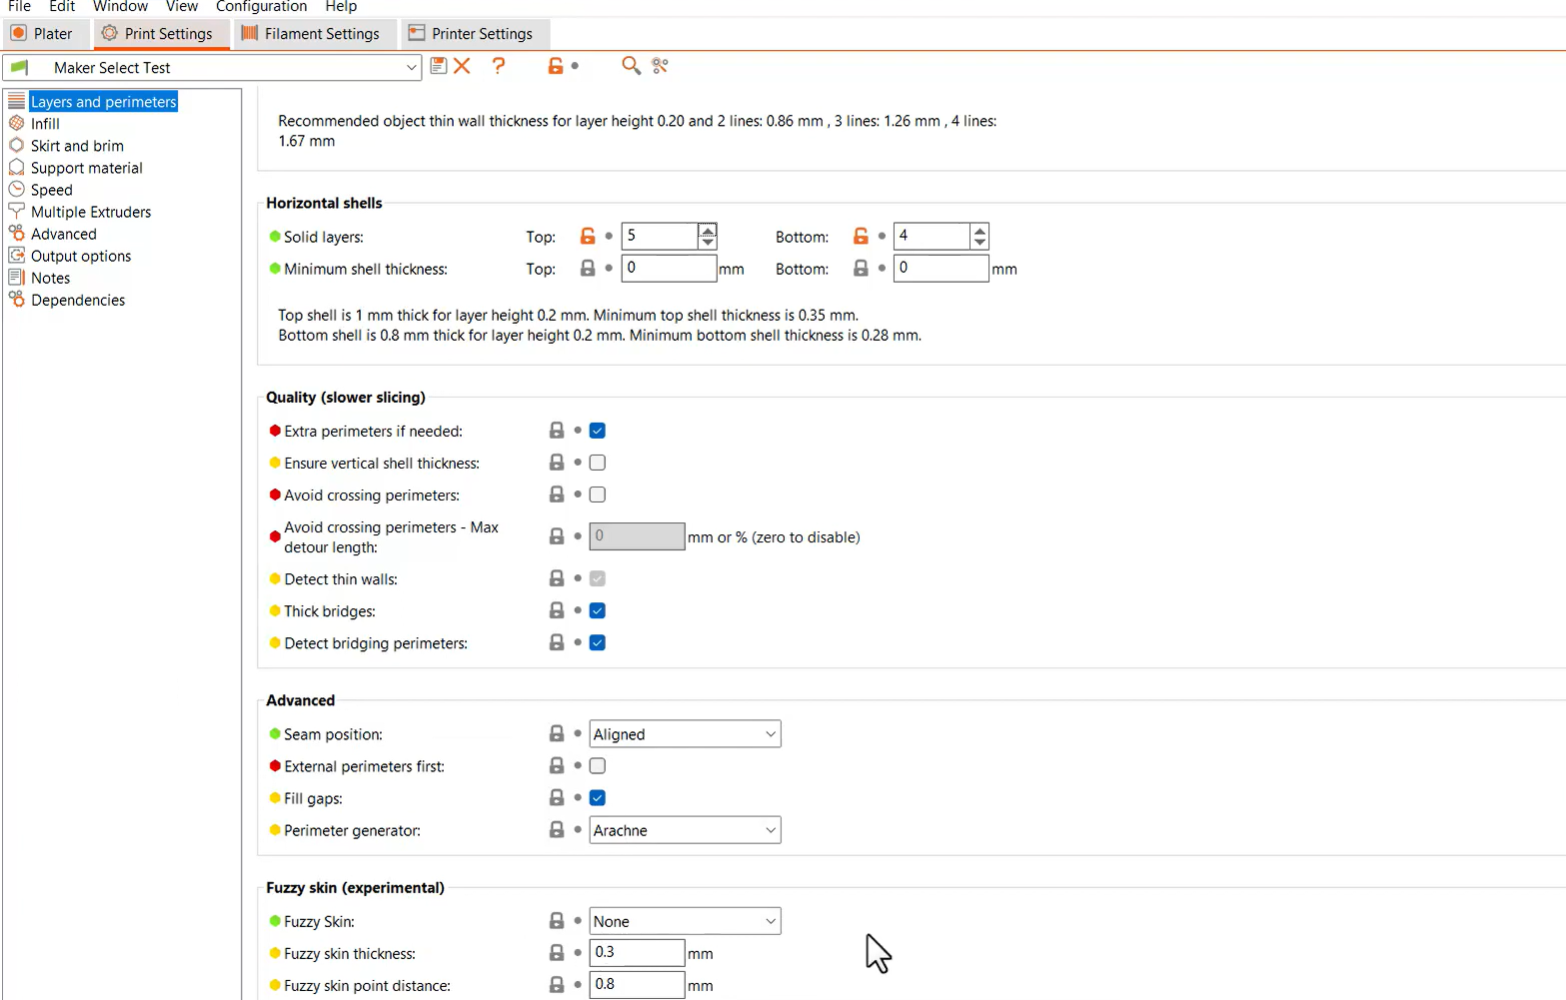
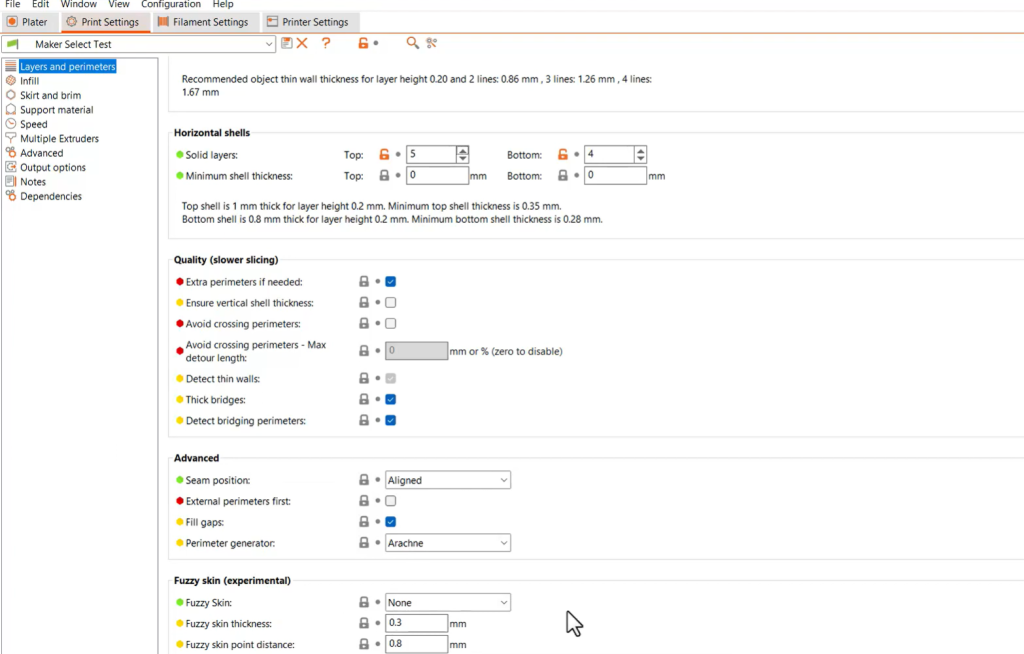
Why are Comprehensive Print Settings necessary?
2 Layers of External Perimeter in Prusa Slicer
Use the layer and perimeter to adjust heights for fast printing and better details.
Print Speed
It increases the print speed, focusing on both quality and quantity.
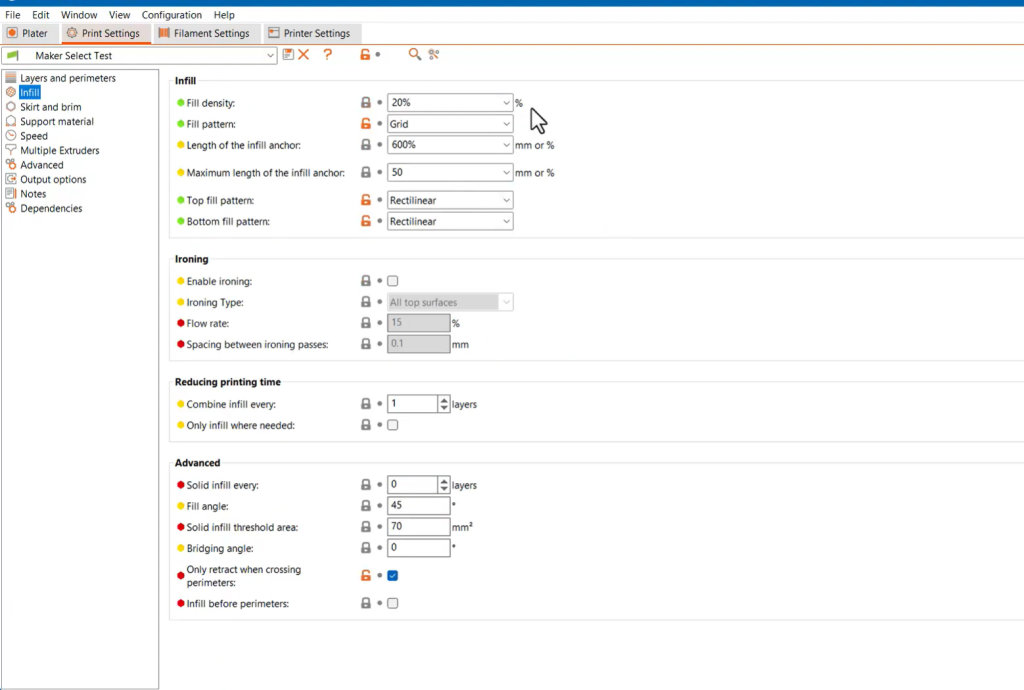
Infill
It allows you to infill density and pattern to improve the quality and material.
PrusaSlicer vs Other Slicers Software
This printing software is a powerful tool to use. There are many alternatives to use, like:
|
Features |
PrusaSlicer |
Cura |
Orca Slicer |
Bambo Studio |
Super Slicer |
|---|---|---|---|---|---|
|
User-friendly |
Easy to use |
Easy to use |
Easy to use |
Easy to use |
Moderate |
|
Pre-configured profiles |
Many available |
Many available |
Many available |
Limited |
Many available |
|
Wireless printing |
No |
No |
Yes |
Yes |
No |
|
Advanced Settings |
Yes |
Yes |
Yes |
Limited |
Yes |
|
Open-source |
Yes |
Yes |
Yes |
No |
Yes |
|
Customizability |
High |
High |
High |
Moderate |
High |
|
Multi-material Printing |
Yes |
Limited |
Yes |
Yes |
Yes |
|
Supported Printers |
Prusa + Third-party |
Wide range |
Wide range |
Limited |
Wide range |
|
Community Support |
Strong |
Strong |
Growing fast |
Moderate |
Niche but active |
Conclusion
The Prusa Slicer is a complete solution for high-quality and efficient 3D printing. It offers smart printer configuration, multi-material printing support, and customizable printing profiles. Seamlessly works on different operating systems and various printing models. Its advanced features, G-code preview, and open-source nature make it an ideal choice for professional printers. So, download the Prusa software for free today.